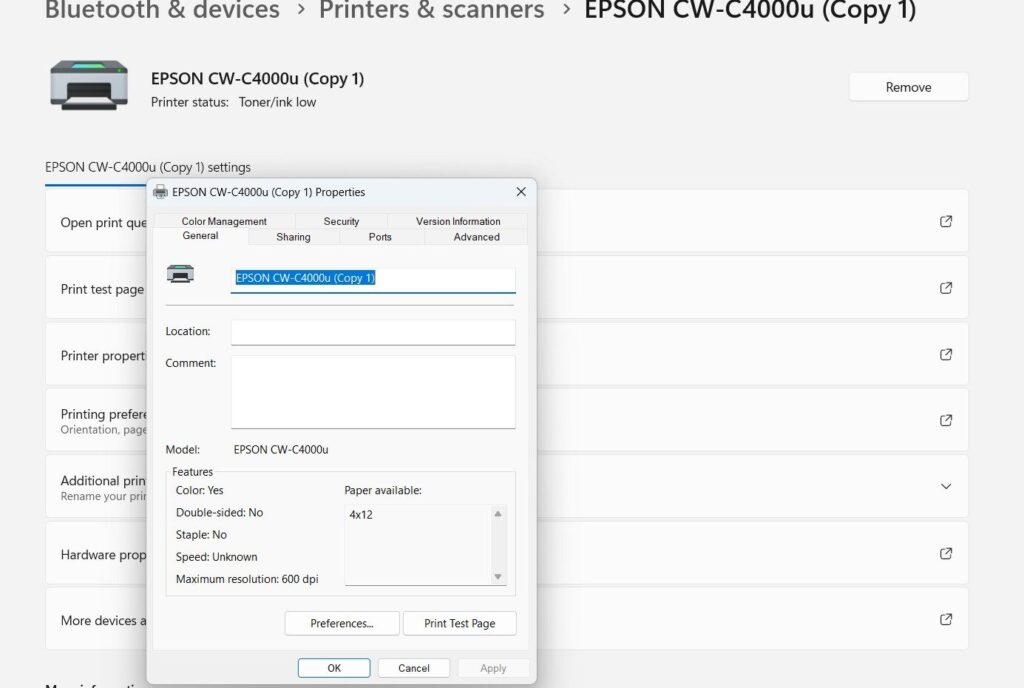
After you finish the driver installation, use the Windows key or start menu to search for “printer” to access the Windows printer configuration interface.

To configure the paper, click on the newly installed printer and select Printer Properties
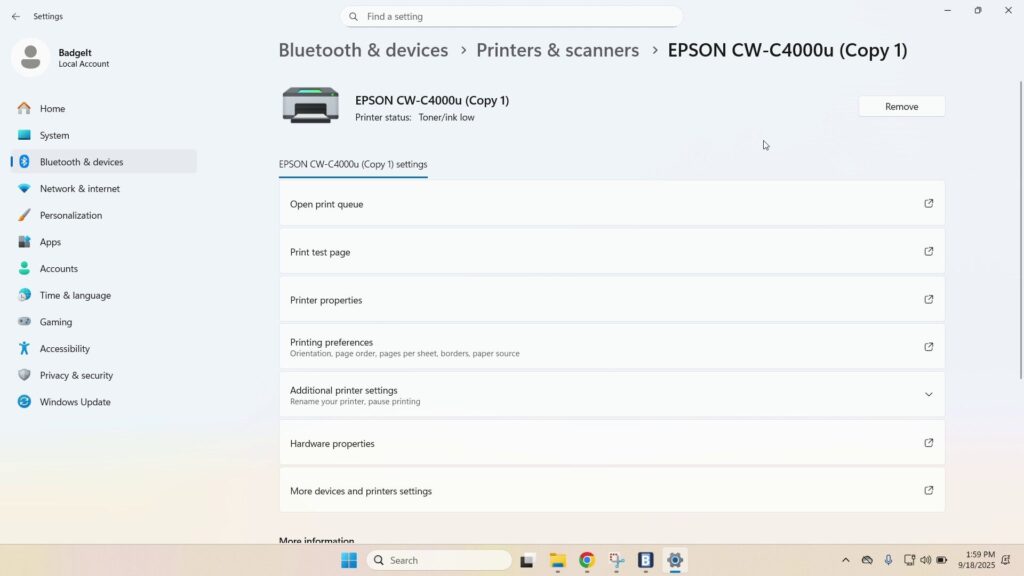
In the “printer properties” window, go to the “Advanced” tab.
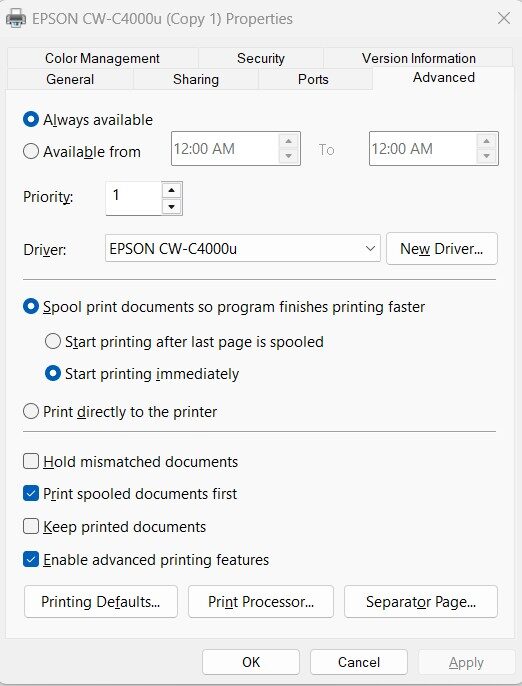
Click on the “Printing Defaults” button.

In the printing panel, click “Media Definition”. Delete any existing profiles and create a new one.
⚠️Even if there is already a 4×12 profile present, delete it and create it from scratch. The provenance of this profile is unknown and it is better to re-do it to avoid any future issues.
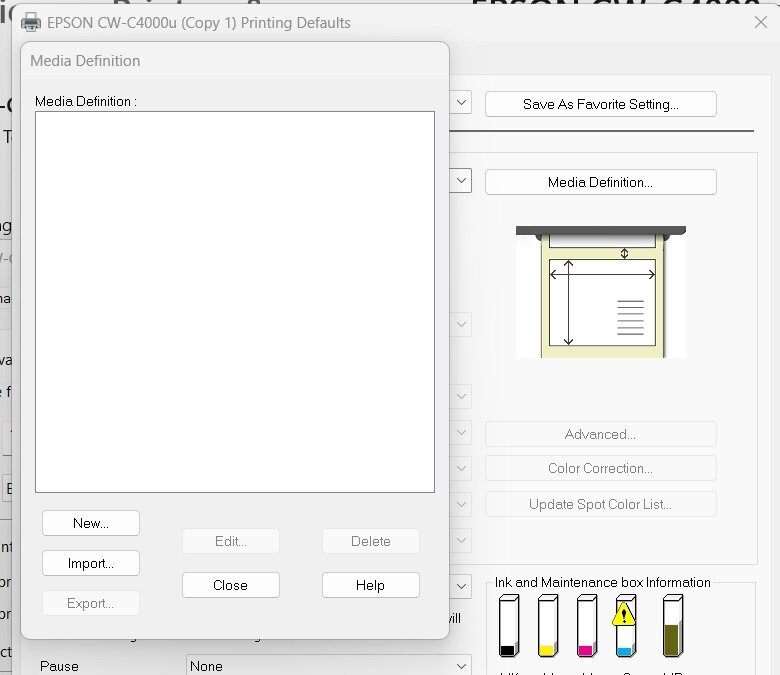
Click on “New”.
- Name the new profile (e.g., “4×12” for the paper BadgeIt provides).
- Set the paper size for width and height (e.g., 4 and 12).
- Set the gap to zero.
- Select “Continuous” paper and “Black Mark” detection.
- Make sure the cut setting is “Cut after the last page of collate page”.
- Make sure the Color Correction setting is set to “ICM“
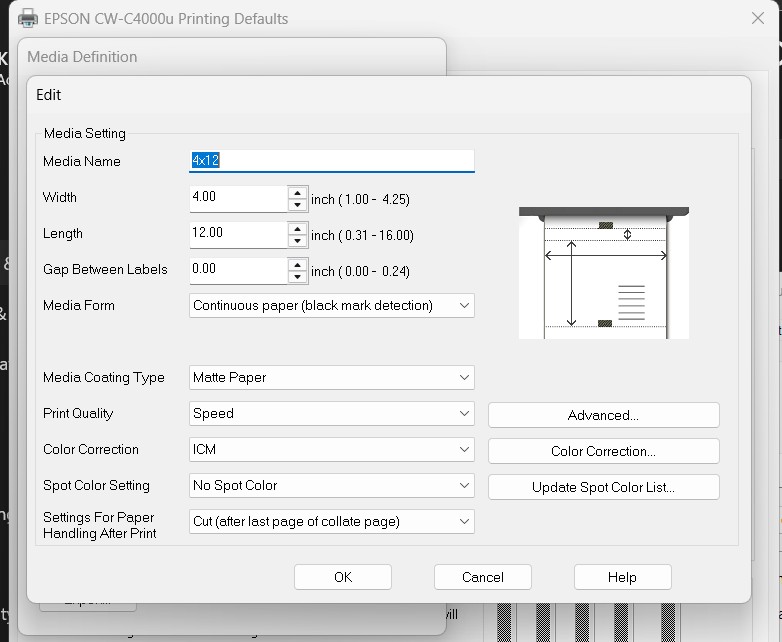
Save the media definition by clicking “OK”.
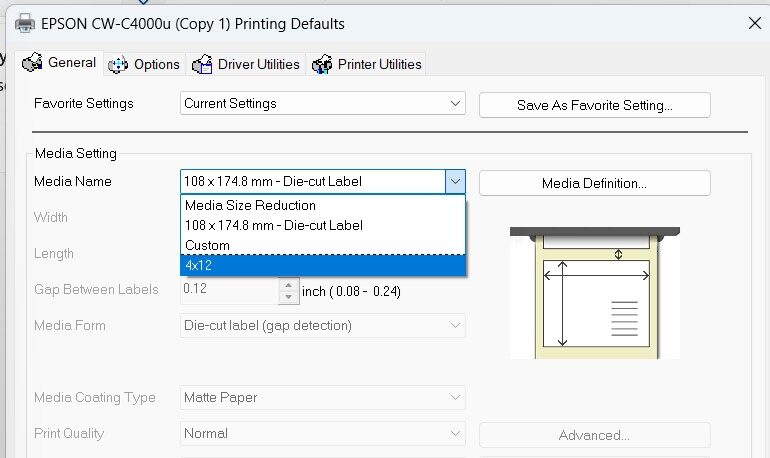
Go back to the printing panel and select the newly created media definition (e.g., “4×12”)
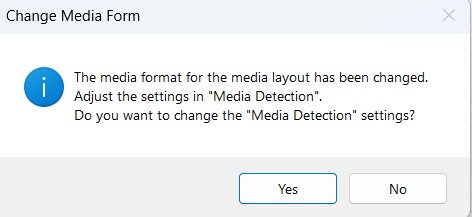
When prompted to adjust, say “yes”.
Set the paper source to “Rear Fed” and the type to “Fanfold” (not a roll).
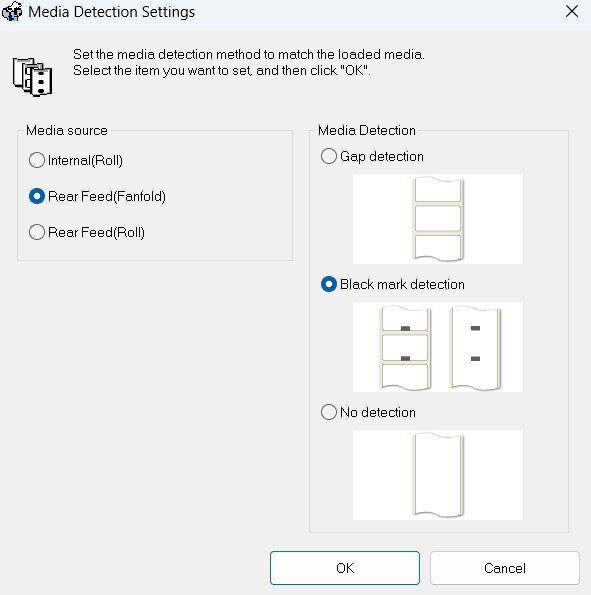
- Ensure “Black Mark detection” is also set here.
- Click “OK” to finish the settings.
- Click “OK” at the bottom of the Printing Defaults window to save.
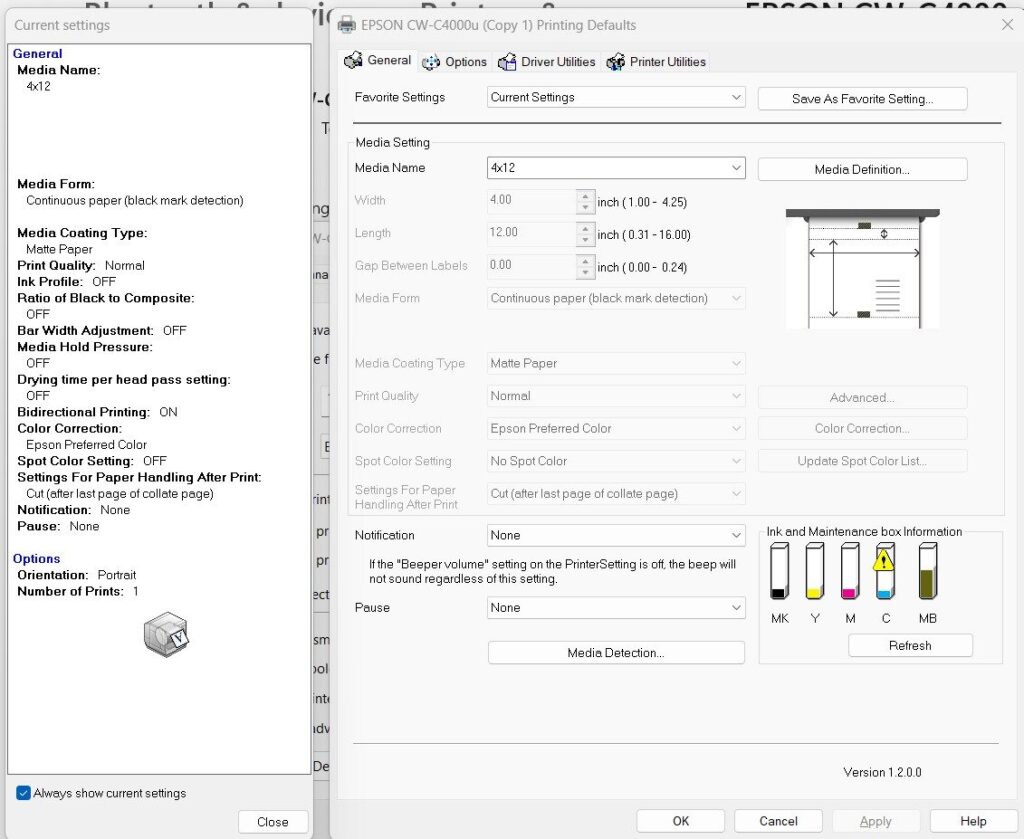
Confirm the setup by reopening the printer properties (not printing preferences) and verifying that the “Paper available” is set to “4×12”.
If it shows millimeter values instead of the profile name, go back to the “Advanced” tab, reselect the profile in the dropdown, and redo the process.